How to migrate your site with WordPress migration plugin
-
Manish Sharma
-
16 Oct 2020
As a WordPress site owner or manager, you may come across the need to migrate your website for a number of reasons. The good news is that migrating the WordPress site a pretty simply process.
You have likely heard about the migration plugin for WordPress. The plugin allows you to migrate the site to the location of preference in straightforward steps.
The WordPress migration plugin is designed to facilitate the transport of the website from one server to another. In a nutshell, the backup is created at one point and is restored on the other. This is what you are doing when you say ‘migrating the site.
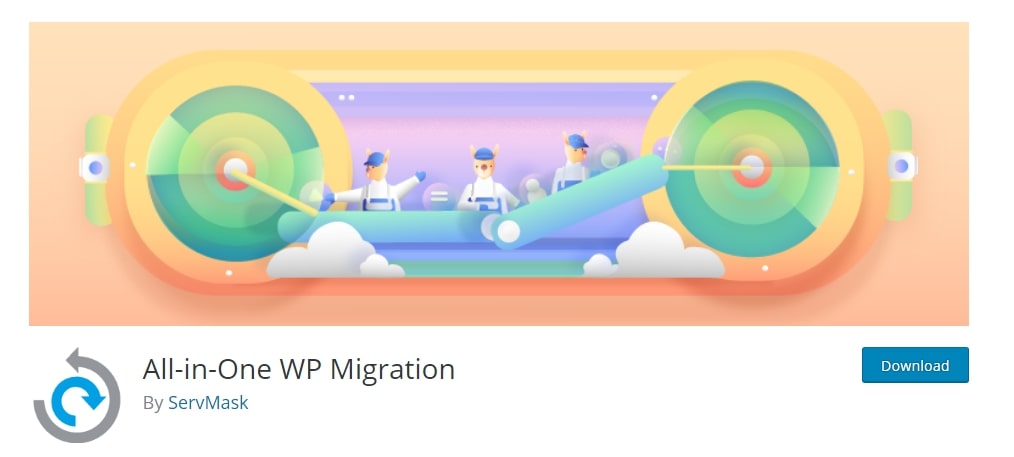
Here is a quick walkthrough of all the steps you will need to take to achieve a seamless WP migration using a plugin. To ease the understanding, lets’ take a WP migration plugin, All-in-One Migration plugin, as an example, and see how to perform the migration.
1. Install the plugin
Installing the plugin is as simple as it gets; all you need to do is pick it from the repository and install and activate it. The action path looks something like this:
- Navigate to Plugins section
- Add Plugins Page
- Search ‘All-in-one WP Migration’ option
- click ‘Install.’
- When the installation process is complete, you will be prompted to click ‘Activate.’
The plugin installation process is complete now.
2. Export the Site
Now it’s time to export the site. The very first requirement to start the process is to have WordPress installed. While using the All-in-One plugin for migration, the user is actually migrating the contents and database– WordPress is not transferred in this case.
Take the following’ Export the Site’ steps:
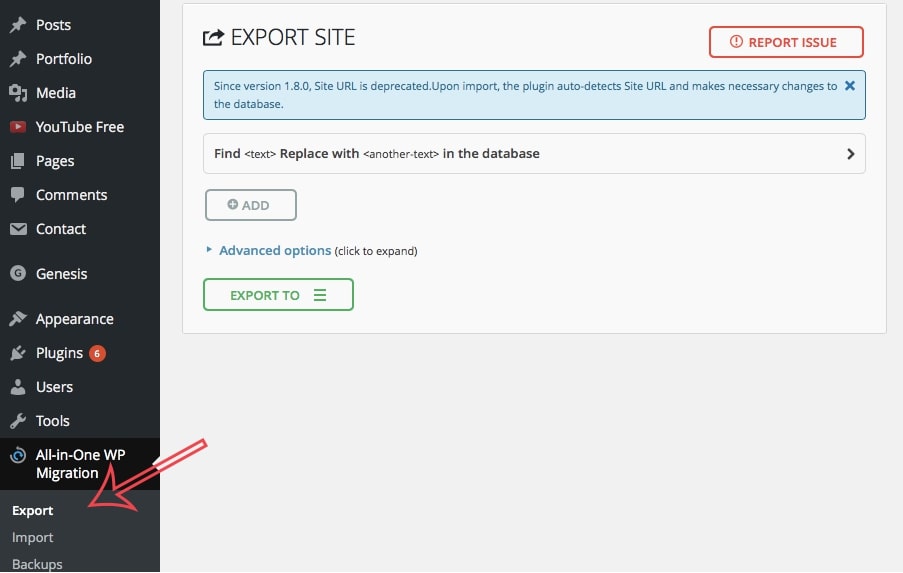
- Reach the WordPress Dashboard Menu and pick the All-in-One WP migration plugin link
- On clicking, you find the ‘Export to’ button on this page
For the most part, all you have to do in this step is click the ‘Export to’ button. However, as per your site’s requirement, you can also consider these options before clicking ‘Export to’ – Find and Replace, Exclusion options, some troubleshooting options. You can choose to exclude certain parts of your website in ‘Exclusion options’ before selecting the ‘Export to’ option. Exclusion options, for example, allow you to prevent these options from exporting to a new location – post revisions, spam comments, media library, database, email domain, plugins, and a few others. Once you have made all required decisions, you can click Export to and finish this step.
How to select the target location:
All-in-One plugin’s free version allows users to export the WordPress site to another location chosen as ‘File.’ There are other target locations available to pick from, including:
- DropBox
- OneDrive
- Azure Storage
- Google Drive
- Amazon Glacier
- Other target locations are available to access with the paid or upgraded version of the All-in-One plugin.
Once you have selected the location, the transfer process begins. Transferring to File location may take time depending upon the site’s size. Once the transfer process is complete, you get the option’ Download,’ which will download the Export file to your local device. There is another place called ‘Backups’ where a file copy of the website is stored. After this step, the process moves to the Import the Site part. The Import process is carried out on the target location or target server.
3. Import the Site
‘Export the file’ step gives you your Export file. Now, the process of completing the migration starts. The possible combinations of movements are – local production site to the client-server (From the developer’s server to a client-server), or from one host to the other. The process of migration for all source and target possibilities is technically the same.
The import process comprises the following steps:
- Fresh installation of WordPress at the destination location: For an entirely new site, the process includes only organizing the hosting and domain name. It is followed by installing WordPress in your new account in the target device/host/server. It is the most straightforward situation. However, when you are moving from one host to another, downtime management is essential.
- If you are changing the host, your priority should be to log in to a new account and import the site in order to follow the change of nameservers.
- You can complete this process by finding the new account’s IP address and mapping this new IP address to the domain name you choose. It completes the import process, which is only when the nameservers are to be changed.
- Now, install the All-in-One plugin for migration again after WordPress’s installation on the target location is complete.
All these steps work as a primer or prepare the setting for the actual import process.
Essential steps in the Import process
There are a few decisions you need to take to ensure a smooth import process. Sometimes, the site moves from a more significant account with more disk size to the smaller one (maybe the traffic or the site load has diminished over the period). So, in that case, the import prompter tells you in advance the size of the file your target location can hold. Remember, certain things are excluded in the export process. However, there are specific ways to fix the situation if the size requirement is more than what’s approved by the destination.
In that case, the next step is to expand the size using some fixing solution, as long as it is permitted according to the terms of the new location. One important tip to avoid manual expansion of size is to go for the ‘Unlimited Extension’ option, which allows the user to migrate the file seamlessly while bypassing the size constraints.
After fixing the size issue and expanding it, the remaining part can be completed using these steps:
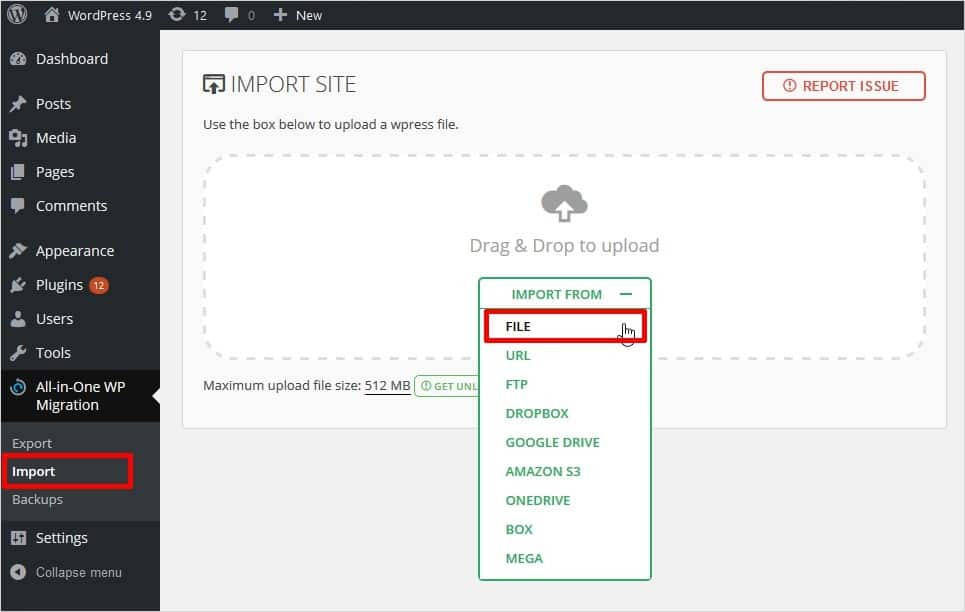
- Click on ‘Import from’ Button
- In the case of free or basic All-in-One migration extension product, the ‘from’ value (or source) can be – File. In advanced subscriptions, the users can migrate the files from other sources like Azure Storage, DropBox, GoogleDrive, and others.
- The system will do several checks within a minute or so. These checks will include – preparing the upload, checking the compatibility of extension, etc.
- After completing all checks, you will be alerted that the files and databases will now be over-written.
- Now click ‘Proceed’ to start the migration or ‘Close’ if you do not want migration to happen.
What indicates the completion of the import process?
You will be informed of the import process’s completion by a message presented on the final screen. It reads, ‘Your data has been imported successfully.’
What to do after completion of the import process
Once the import process is complete, you can log on to the new site. At this stage, you will need the credentials that you used to login to the site in an old location. Now, save the permalinks two times.
Finally, migrating the WordPress website from one location to another is complete using the All-in-One migration plugin for WordPress.
Some optional activities worth knowing to complete the migration process
Users who want to migrate the WordPress site from one host to another, or from one IP address to another, or from developer server to client-server, may need to do the following optional actions according to their specific requirements:
- Use the find/replace option if you want to replace some values of the database.
- Use Advanced Options like ‘Exclude option’ when you do not want to migrate some aspects like revised posts, spam posts, inactive themes, export Cache, inactive plugins, etc. to the new location.
Actions that you should do only on certain conditions
There are specific steps in the migration process that you should do when facing specific issues. These are:
- Exporting media library – It should be done only for troubleshooting purposes
- Export themes – Only when the theme is preventing a backup or restore
- Export must-use plugins – Only when you face issues in moving from one host to other
- Export database – Again, only to troubleshoot
- Export plugins – Only to troubleshoot or to exclude all plugins
Remember that you should not replace the email domain if you do not want your email address to change.
To sum it all, WordPress site migration becomes easy and seamless with the use of plugins. Apart from All-in-One, other plugins, such as Duplicator, UpdraftPlus Premium, and JetPack can help the site managers carry out the migration process with no hassles. However, keep the points that involve ‘don’ts’ in mind so that no negative impact falls on the site’s functioning when it is operated from another location.
Recommended WordPress Hosting
Featured WordPress Plugin

Latest blog articles
- Best WordPress Theme for SEO Are you having trouble finding an appropriate theme for your website?
- How To Start A Fitness Blog; Steps And Recommendations Are you having trouble finding an appropriate theme for your website?
- Best Website Builder for Authors you should consider in 2021 Are you having trouble finding an appropriate theme for your website?
- Easy and Effective ways to create a Landing page in WordPress Are you having trouble finding an appropriate theme for your website?
- How to Add an Accordion in WordPress Are you having trouble finding an appropriate theme for your website?
- Top 5 PayPal Plugin For WordPress; Reviews, Pricing, And Comparison Are you having trouble finding an appropriate theme for your website?